

How-to
Manage Users and Groups:
Create User Groups
Previously: How to Create and Manage Tiles.
This section helps with managing users and groups.
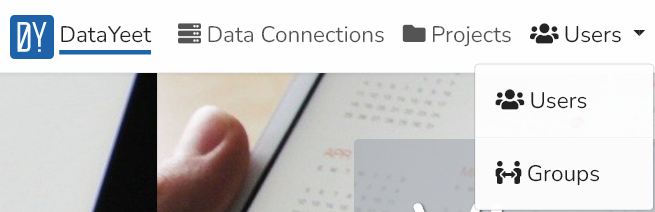
To create a new group, navigate to the Groups by clicking on the Users in the top navigation menu and then on Groups. After that - click on +Group.
 This will bring up the window shown below.
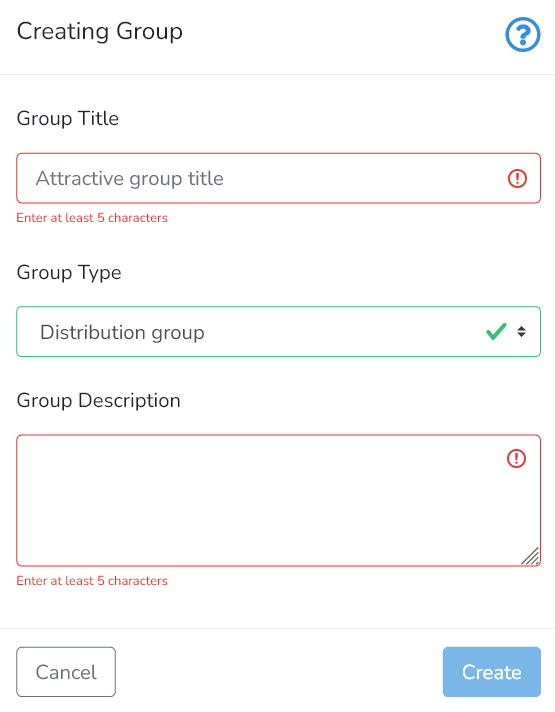
The user needs to provide the Group Title (at least 5 characters long), and the Group Description. The group description should provide extra information about the group.
Finally, the user needs to select the group type that suits their requirements. Currently, there are two options available: Private and Distribution Group.
The Private Group allows collecting DataYeet users to jointly share data connections and projects. A private group and its' content are visible only to its' members. To become a member of a private group - users must, first, be invited by the group admin, and second, accept an invitation to the private group. All members of the group become related to each other on DataYeet and start appearing in the lists for sharing and invitations.
Users can also create any number of Private Groups and invite either related users or any other users via their email.
The Distribution Group works like a distribution list used in email communication. A distribution group owner can add to the group either related users or any other users view their email addresses. Added users will not be notified that they were added to the group and they will not see the distribution groups they are included in.
Users can create any number of Distribution Groups and add there any number of related users.
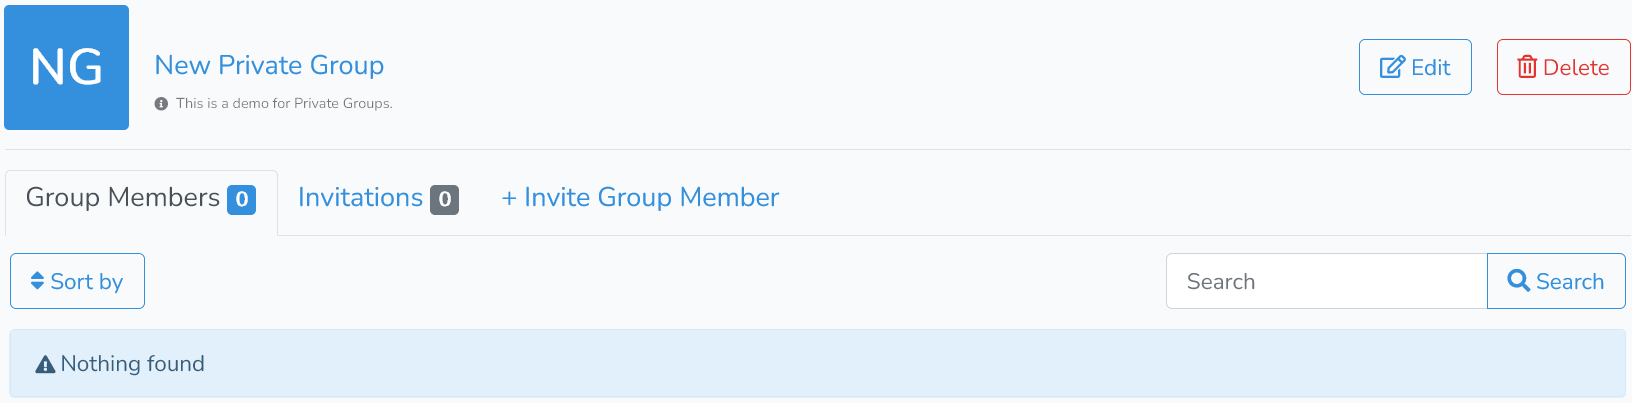
When all required inputs are provided, click on Create to save the newly created group. The group will look like the image shown below.
Next is How to Edit User Groups.